Page History: Getting started
Compare Page Revisions
Page Revision: Friday, 11 December 2009 10:31
Introduction
Solo is a call handling system which controls
SIP phone calls. The calls ring and can be made from within Solo on screen and can be answered by the user using a mouse or touch screen. A full database of calls and caller information is maintained and details of each caller can be entered and are recalled when they call in again. The caller's audio is heard through the soundcard of the PC or via a SIP handset if configured.
Solo can make and receive calls over ISDN or analogue lines via the use of a SIP gateway.
Each main Solo can have up to 2 Solos connected to it. These are referred to as buddies and can control the same calls as the main Solo. They can have independent audio devices allowing calls to be routed out of a soundcard on the main or buddy PC.
Requirements
Main Solo
- A SIP gateway or service. Solo will register with the gateway to make and receive calls.
- A Windows PC to run Solo on.
- A supported soundcard. With Solo 2.0 and above any WAVE or ASIO soundcard should work – but see our other tips for more information on this as better cards have lower latency.
- Optional – a Linksys handset to screen callers without using the mixing desk.
- Optional - Advantech GPI/O card for service ringing/device occupied outputs and answer and drop inputs.
Buddy
- A Windows PC to run Solo on.
- For a buddy with audio – a supported soundcard.
- For a buddy without audio – you will simply be controlling the calls on the main Solo.
- Optional – a Linksys handset to screen callers without using the mixing desk.
Minimum specification
- Microsoft Windows XP or above
- 2Ghz or faster processor
- 1GB RAM
- 10GB Hard disk space
- 1024x768 resolution
Solo Topology
The following 3 diagrams show the setup options for Solo as you can see they are almost the
same, the difference lies in the type of incoming lines you have, SIP, ISDN or Analogue.
Using a SIP provider
Incoming SIP lines from your SIP provider terminate directly in
Solo. Shown here you can see the Solo PC has a dual SIP IP Hybrid and Music on Hold and
the option for 2 buddies with audio.
Using ISDN lines and a SIP gateway
Incoming ISDN lines are received into your SIP Gateway, the
SIP output from your gateway then terminate directly in Solo. Shown here you can see the
Solo PC has a dual SIP IP Hybrid and Music on Hold and the option for 2 buddies with audio.
Using Analogue lines and a SIP gateway
Incoming Analogue lines are received into your SIP Gateway,
the SIP output from your gateway then terminate directly in Solo. Shown here you can see the
Solo PC has a dual SIP IP Hybrid and Music on Hold and the option for 2 buddies with audio.
Audio to sound desk
Ongoing connections to your sound desk are via the soundcard outputs from your PC.
Installing
Downloading the software
Once you have your hardware in place and setup correctly you are ready to download your
Solo software. To do this simply go to http://download.bionics.co.uk and log on using the details you were provided with following your purchase and you will be able to download your PhoneBOX Solo software.
Starting Solo for the first time
Now you have downloaded your software, to start Solo, simply click on the start menu icon as you would to start any other application.
The Solo software will load and, if Solo has not already been licensed, will prompt you to request a license. Click the 'Request/Download' button, enter your details to submit a license request. Following this Solo will close. Until a license has been issue it is not possible to start Solo.
Once a license has been issued, you will receive an email from support@bionics.co.uk informing you that your licence request has been approved. Upon receipt of this email you will now be able to Solo as a licensed user. Simply open Solo again and the license will be downloaded automatically.
Audio Settings
You will be prompted to set up your audio settings using the following dialogue box.
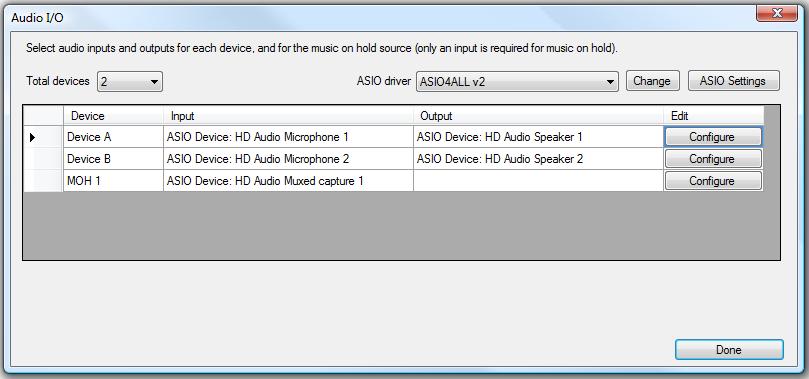
Click 'Configure' for each device and you will be presented with the following to make you selections.
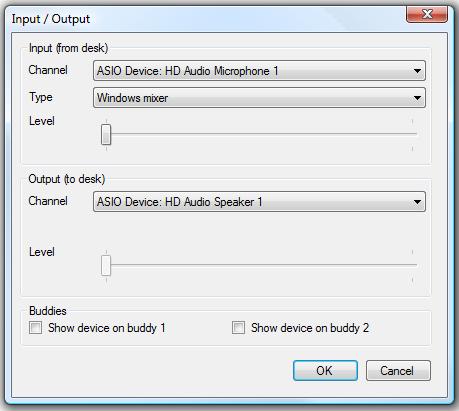
Select your input and output channel devices from the drop down boxes and click OK. Simply repeat this process for each device and for your Music on Hold (MOH). Your MOH will only require and input channel. Should you need to edit these at a later date you can find the 'Audio Settings' dialogue box in the Tools > Admin menu Once completed click OK and you will be prompted to set up your SIP settings.
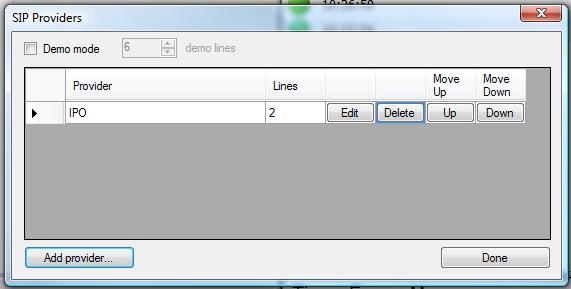
SIP Settings